Introducción
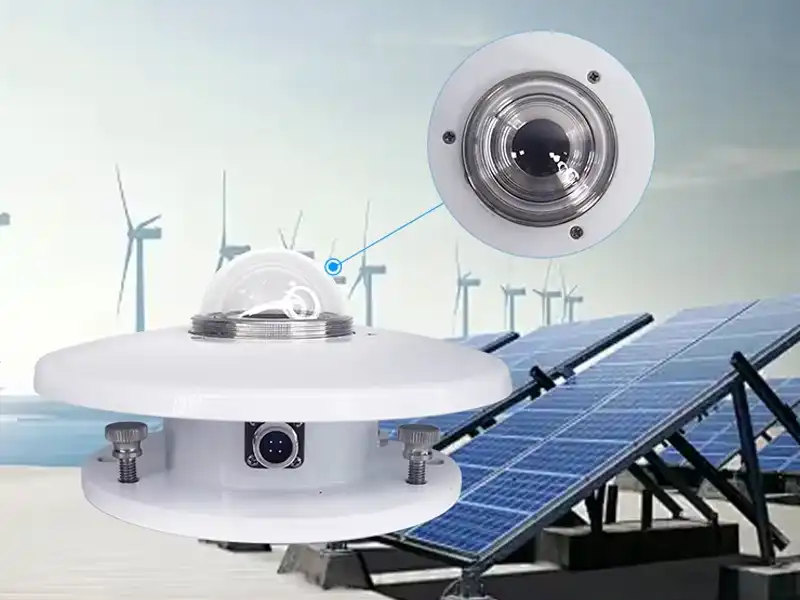
A piranómetro es un instrumento de precisión diseñado para medir la irradiancia solar global (W/m²), proporcionando datos críticos para la evaluación de la energía solar y la vigilancia del medio ambiente.
Comprender cómo utilizar correctamente un piranómetro es esencial para garantizar resultados fiables en aplicaciones como la optimización de sistemas fotovoltaicos, la observación meteorológica, la agricultura y la investigación. La precisión de las mediciones es muy sensible a factores como el ángulo de instalación, el sombreado, los intervalos de calibración y las condiciones ambientales. Sin una configuración y un mantenimiento adecuados, los errores pueden acumularse rápidamente, afectando directamente a la calidad de los datos y a la toma de decisiones.
Esta guía explica cómo utilizar un piranómetro paso a paso, incluyendo la instalación, la calibración, los métodos de medición y las prácticas de mantenimiento para garantizar unos datos de radiación solar precisos y coherentes.
¿Cómo funciona un piranómetro?
Un piranómetro mide la irradiancia solar global convirtiendo la radiación solar incidente en una señal eléctrica proporcional, lo que permite una salida normalizada en W/m² en condiciones de medición definidas internacionalmente. Su principio de funcionamiento y sus prestaciones están definidos por normas como las directrices de la Organización Meteorológica Mundial y la norma ISO 9060, que garantizan la trazabilidad y la precisión.

Sensores termopila frente a fotodiodo
Los piranómetros de termopila funcionan basándose en el efecto Seebeck, en el que la radiación absorbida crea una diferencia de temperatura a través de los termopares, generando una señal de tensión. Proporcionan una medición de alta precisión y de espectro completo, que suele abarcar 285-2800 nm, para que cumplan la normativa Clasificaciones ISO 9060 Clase A/B/C.
En cambio, los sensores de fotodiodo detectan la radiación mediante la respuesta de un semiconductor. Ofrecen tiempos de respuesta más rápidos y un coste menor, pero tienen un rango espectral limitado y una estabilidad a largo plazo reducida, lo que los hace menos adecuados para aplicaciones de alta precisión.
Gama espectral y tiempo de respuesta
Los sensores de termopila captan casi todo el espectro solar (285-2800 nm), lo que garantiza un rendimiento fiable en condiciones atmosféricas variables, incluida la nubosidad y los ángulos الشمس bajos. Su tiempo de respuesta es más lento (normalmente segundos), pero altamente estable.
Los piranómetros basados en fotodiodos responden en milisegundos, lo que beneficia el control en tiempo real, pero su sensibilidad espectral restringida puede introducir un sesgo de medición en condiciones de luz cambiantes.
Señal de salida (conversión mV / W/m²)
Un piranómetro emite una señal analógica de bajo nivel (μV o mV) directamente proporcional a la irradiancia incidente. Esta señal se convierte en W/m² mediante un coeficiente de calibración de fábrica (factor de sensibilidad), lo que garantiza la coherencia con las normas internacionales de medición. Según la clasificación ISO 9060, la precisión del sensor se clasifica en Clase A (máxima precisión), Clase B y Clase C, El rendimiento se define por parámetros como la estabilidad de la sensibilidad, la respuesta a la temperatura y el error direccional.
Cómo utilizar correctamente un piranómetro?
Utilizar correctamente un piranómetro es esencial para obtener datos fiables de irradiancia solar global (W/m²) para aplicaciones como la monitorización fotovoltaica solar, estaciones meteorológicas y proyectos de investigación. Si se siguen los procedimientos adecuados, se puede reducir la incertidumbre de medición en 2-5% y garantizar la estabilidad de los datos a largo plazo. En la práctica, es necesario gestionar cuidadosamente la instalación, la conexión de la señal y la configuración de los datos. Con el apoyo de Yantai pyranometer solutions, proporcionamos sensores calibrados en fábrica, orientación para la instalación y asistencia para la integración del sistema de datos para ayudarle a conseguir mediciones de campo precisas desde el principio.
Paso 1 - Instale el piranómetro correctamente
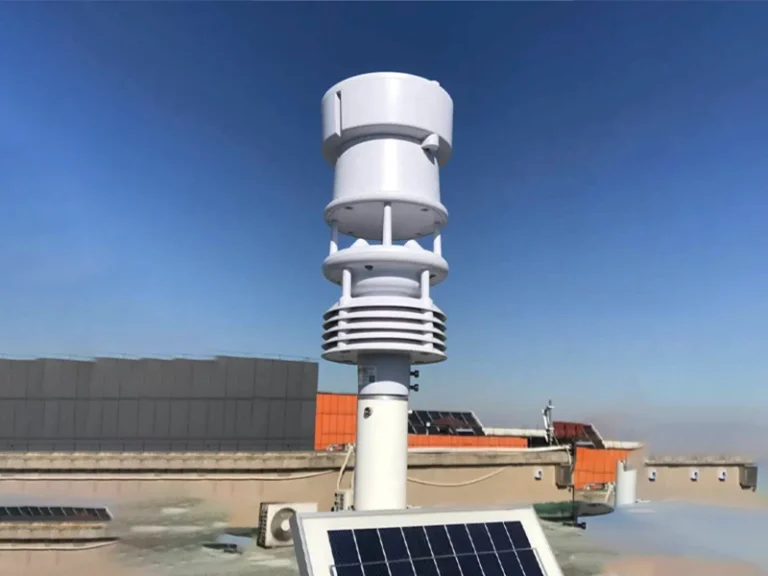
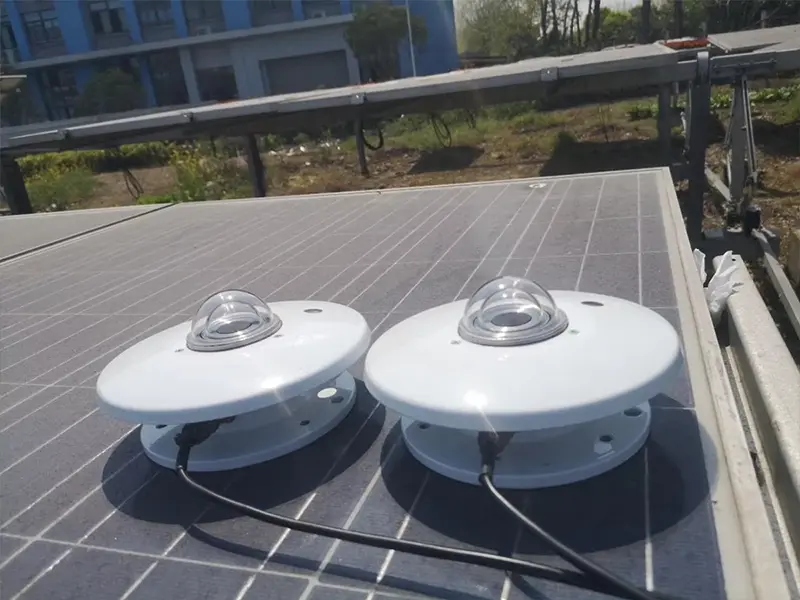
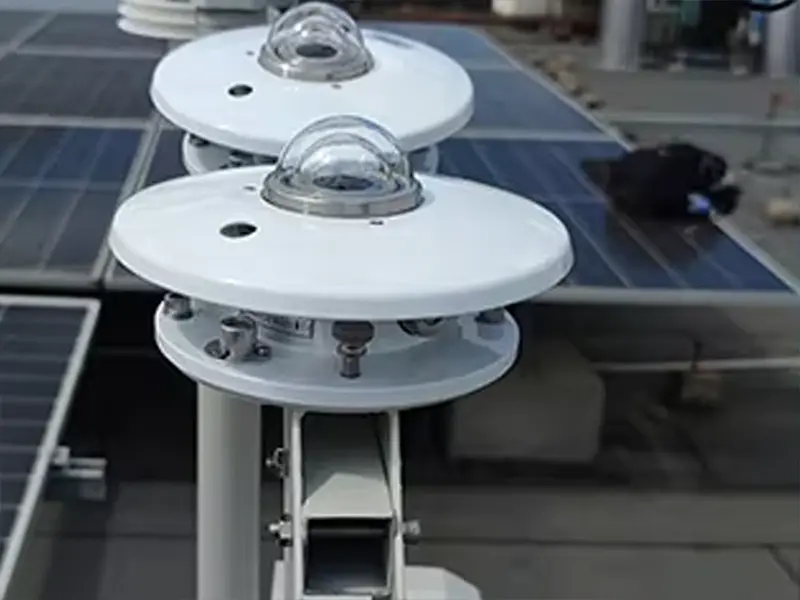
Debe instalar el piranómetro en una zona abierta con sin sombra durante todo el año. Incluso las sombras parciales de edificios, postes o árboles pueden distorsionar significativamente las lecturas de irradiancia.
Evite colocar el sensor cerca de superficies reflectantes como cristal, metal o paredes brillantes, ya que la luz reflejada puede introducir un sesgo en la medición.
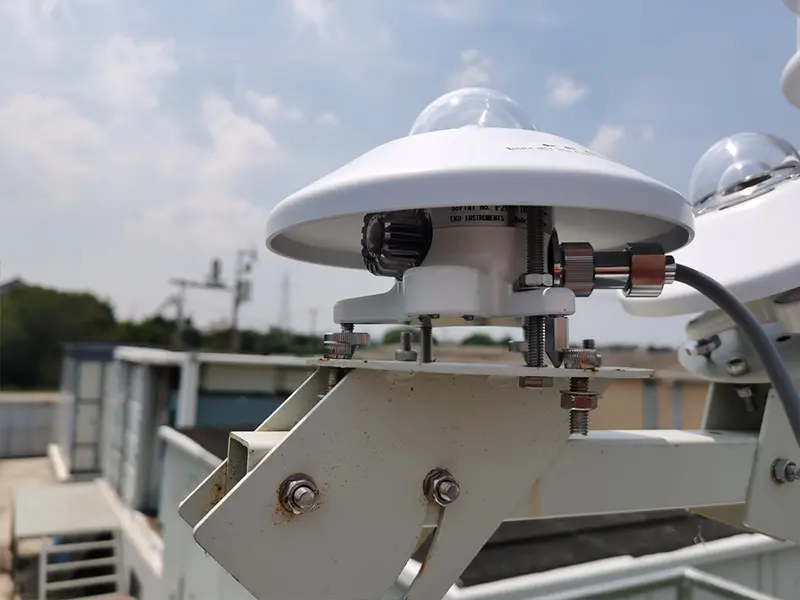
Asegúrese de que el sensor está perfectamente nivelado utilizando un nivel de burbuja, con un error de inclinación controlado dentro de ±1 para mantener la precisión.
Paso 2 - Conexión al registrador de datos
Es necesario conectar el piranómetro a un sistema de registro de datos compatible para registrar las mediciones en tiempo real.
- Salida analógica: Señal de μV/mV para sistemas tradicionales
- Salida digital: RS485 / Modbus para plataformas de supervisión inteligentes
Asegúrate de que todo el cableado es estable y está debidamente apantallado para evitar ruidos en la señal o interferencias en la transmisión, especialmente en instalaciones a larga distancia.
Paso 3 - Configuración de los parámetros de medición
Deberá configurar los ajustes de adquisición de datos en función de las necesidades de su aplicación.
- Frecuencia de muestreo: Muestreo de 1 segundo para supervisión dinámica
- Promedio: Media de 1 minuto para datos estables a largo plazo
- Unidad: potencia estándar en W/m² para la irradiancia solar
La sincronización horaria también es importante para garantizar la coherencia entre varios sensores o estaciones.
Paso 4 - Iniciar la recogida de datos
Una vez finalizada la configuración, puede empezar a monitorizar la irradiancia en tiempo real.
Debe verificar que la salida del sensor es estable y consistente en condiciones de cielo despejado.
Compruebe regularmente las lecturas de referencia para asegurarse de que no se producen fluctuaciones repentinas causadas por problemas de cableado, interferencias ambientales o desalineación del sensor.
¿Cómo calibrar un piranómetro?
La calibración de piranómetros garantiza que sus mediciones de irradiancia solar sigan siendo precisas, trazables y constantes a lo largo del tiempo. Realizamos la calibración en fábrica antes del envío utilizando instrumentos de referencia certificados, por lo que su sensor llega listo para su despliegue sobre el terreno con un factor de sensibilidad definido. Sin embargo, la exposición ambiental y el uso a largo plazo pueden afectar gradualmente a la precisión, por lo que suele ser necesario recalibrarlo cada 1-2 años en función de las condiciones de funcionamiento. También le ofrecemos asesoramiento sobre calibración, documentación y coordinación de servicios opcionales para ayudarle a mantener el cumplimiento de las normas del sector y un rendimiento fiable a largo plazo.
Calibración de fábrica frente a calibración sobre el terreno
La calibración de fábrica se lleva a cabo en condiciones de laboratorio controladas, utilizando instrumentos de referencia para determinar el coeficiente de sensibilidad del sensor. La calibración de campo, por su parte, se realiza tras la instalación para verificar el rendimiento en condiciones ambientales reales. Ambos métodos garantizan la trazabilidad de los datos, pero la calibración de fábrica proporciona la precisión de referencia, mientras que la calibración de campo confirma la estabilidad operativa.
Intervalo de calibración (habitual: 1-2 años)
En la mayoría de las aplicaciones, los piranómetros deben recalibrarse cada 12 o 24 meses. Los proyectos de alta precisión, como la monitorización del rendimiento fotovoltaico o las estaciones meteorológicas, pueden requerir una verificación más frecuente. Yantai ofrece programas de mantenimiento recomendados en función del entorno de aplicación para ayudar a mantener la fiabilidad de las mediciones.
Método de comparación de referencia
El método de comparación con referencia consiste en colocar el piranómetro junto a un sensor de referencia calibrado en condiciones idénticas y comparar los valores obtenidos. Este método se ajusta a la norma ISO 9847 y se utiliza ampliamente para la validación sobre el terreno. Podemos ayudarle con los procedimientos de calibración, las instrucciones de configuración y las recomendaciones sobre equipos de referencia para garantizar resultados precisos y normalizados.
¿Cómo tomar medidas precisas?
La precisión de las mediciones con piranómetros depende de una configuración adecuada de la adquisición de datos, una conversión correcta de la señal y un control eficaz de los errores. Al poner en marcha un sistema, es necesario asegurarse de que el registrador de datos esté configurado correctamente, de que la estrategia de muestreo se adapte a la aplicación y de que los factores ambientales se gestionen adecuadamente. En la mayoría de las instalaciones de monitorización solar, incluso pequeños problemas como intervalos de promediado inadecuados o ruido en la señal pueden provocar desviaciones de 1–31 TP3T en los datos de irradiancia. Siguiendo prácticas de medición estandarizadas y utilizando instrumentos bien calibrados, se puede mejorar significativamente la fiabilidad de los datos para la monitorización fotovoltaica, los estudios meteorológicos o las aplicaciones de investigación.
Frecuencia de registro de datos
Debes seleccionar la frecuencia de registro en función de los requisitos de tu aplicación. Entre los ajustes más habituales se incluyen: Muestreo cada segundo para una monitorización de alta resolución y Promedio de 1 minuto para un análisis estable a largo plazo. Una frecuencia más alta capta las fluctuaciones a corto plazo, mientras que el promedio reduce el ruido y mejora la estabilidad de la tendencia.
Fórmula de conversión de unidades
Para garantizar un cálculo coherente de la irradiancia, es necesario convertir la señal de salida del sensor a unidades estándar:
I = V × C
Dónde:
- I = Irradiancia (W/m²)
- V = Tensión de salida (μV)
- C = Factor de calibración (W/m² por μV)
Esta conversión garantiza que las señales eléctricas sin procesar se estandaricen en datos de radiación solar comparables a nivel internacional.
Cómo evitar errores de medición
Para garantizar la precisión, es necesario controlar los factores ambientales y del sistema más importantes.
Mantenimiento del piranómetro
El mantenimiento del piranómetro es esencial para garantizar la estabilidad y precisión de los datos de irradiación solar durante su funcionamiento a largo plazo. Si se realiza un mantenimiento adecuado del sensor, se puede reducir la desviación de las mediciones en torno a un 2–51 % y prolongar su vida útil en entornos exteriores. En el uso diario, es necesario centrarse en la limpieza, la inspección y las comprobaciones del sistema para garantizar que el instrumento siga funcionando dentro de los límites de precisión esperados.
1. Limpieza del sensor
Debe limpiar regularmente la superficie de la cúpula para eliminar el polvo, los restos de lluvia o los excrementos de aves. Incluso una fina capa de suciedad puede reducir la precisión de la señal entre un 2 % y un 31 %. Utilice un paño suave y agua destilada para evitar rayar la superficie óptica.
2. Inspección física
Debe revisar la carcasa del sensor, los cables y la estructura de montaje. Compruebe si hay grietas, conexiones sueltas o corrosión, especialmente en entornos hostiles, como zonas costeras o industriales.
3. Comprobación del nivel y la posición
Debe comprobar que el piranómetro permanezca correctamente nivelado. Una desviación de inclinación superior a ±1° puede provocar errores de medición apreciables, especialmente en aplicaciones de alta precisión.
4. Comprobación de datos y señales
Debe revisar periódicamente las señales de salida y los registros de datos para detectar fluctuaciones anormales. Unas lecturas de referencia estables en condiciones de cielo despejado indican un funcionamiento normal, mientras que los cambios repentinos pueden indicar problemas en el cableado o en los sensores.
Conclusión
El uso adecuado de un piranómetro depende de tres factores fundamentales: una instalación correcta, una calibración periódica y un mantenimiento constante. La instalación determina la precisión de la medición de referencia, al garantizar una nivelación adecuada y un control adecuado de la sombra. La calibración garantiza la trazabilidad de los datos y mantiene el sensor alineado con los estándares reconocidos a lo largo del tiempo. El mantenimiento, que incluye la limpieza y las comprobaciones del sistema, ayuda a reducir la deriva a largo plazo y evita errores de medición evitables.
Si está planeando un proyecto de monitorización solar o necesita ayuda para seleccionar, instalar o calibrar un piranómetro, no dude en Contacto para obtener asesoramiento técnico y soluciones de productos adaptadas a su aplicación.